
Cheesy Super Bowl Party Spinach Artichoke Dip Recipe to Impress

Indulging in a warm, creamy bowl of Cheesy Super Bowl Party Spinach Artichoke Dip is like wrapping yourself in a cozy blanket of flavors. Picture this delightful dip bubbling away in the oven, sending ribbons of cheese stretching gloriously as you dig into it with a crisp tortilla chip. The aroma of garlic mingling with sautéed spinach fills the air, making your taste buds dance in anticipation. Who wouldn’t want to serve this luscious creation at their next gathering? It’s the perfect appetizer that guarantees to impress and satisfy even the pickiest of eaters. Flashback to last year’s Super Bowl party at my friend Lisa’s place, where this dip became the undisputed star of the spread. As the big game played on the screen and cheers erupted from the living room, we were huddled around the kitchen, clamoring for just one more scoop of this magical concoction. It was a blend of unexpected flavors, a symphony of creaminess with bursts of savory artichoke hearts and vibrant green spinach. Let’s dive into making this Cheesy Super Bowl Party Spinach Artichoke Dip that will turn any get-together into an unforgettable feast. Ingredients for Cheesy Super Bowl Party Spinach Artichoke Dip Here’s what you’ll need to make this delicious Cheesy Super Bowl Party Spinach Artichoke Dip: 2 cups fresh spinach – Look for vibrant, firm leaves, and wash them thoroughly; fresh spinach adds a burst of color and nutrients. 1 can (14 oz) canned artichoke hearts, chopped – Choose artichoke hearts packed in water or oil; these tender morsels add a pleasant tang. 8 oz cream cheese, softened – Let it come to room temperature for easy mixing; it creates the rich, creamy base of the dip. 1 cup sour cream – Opt for full-fat sour cream for ultimate creaminess; it brings just the right amount of tang to balance the flavors. 2 cups shredded mozzarella cheese – Use whole-milk mozzarella for a gooey texture that stretches delightfully as you serve it up. ½ cup grated Parmesan cheese – The sharpness from Parmesan will elevate the dish, lending a savory depth that will have everyone coming back for more. 1 tsp garlic powder – A must-have for that aromatic flavor; it infuses the dip with its warm, comforting essence. Salt and pepper to taste – Be sure to season adequately for a well-rounded flavor profile. How to Make Cheesy Super Bowl Party Spinach Artichoke Dip Follow these simple steps to prepare this delicious Cheesy Super Bowl Party Spinach Artichoke Dip: Step 1: Preheat the Oven Preheat your oven to 350°F (175°C) and lightly grease a baking dish with nonstick spray. This will prepare your cooking environment for that melty goodness. Step 2: Sauté the Spinach In a skillet over medium heat, sauté the fresh spinach for about 3-4 minutes until it wilts. Be careful to season it with a pinch of salt for flavor enhancement, encouraging it to give up its moisture. Step 3: Mix the Cheesy Base In a mixing bowl, combine the softened cream cheese, sour cream, garlic powder, shredded mozzarella, grated Parmesan cheese, and season with salt and pepper. Stir until the mixture is perfectly smooth; your arms might get a workout, but it’s worth it for that creamy texture. Step 4: Fold in the Goodies Gently fold the sautéed spinach and chopped artichokes into your cheesy mixture. Ensure everything is evenly distributed so that every bite is loaded with delicious flavors. Step 5: Pour into the Baking Dish Spread the mixture into the prepared baking dish, smoothing the top a bit for even baking. Pop it into that preheated oven and let it bake for 25-30 minutes, or until it’s bubbling and has a lovely golden brown top. Step 6: Cool and Serve Once done, allow the dip to cool slightly for a few minutes (as hard as it may be) before serving it with your choice of tortilla chips or sliced baguette. The anticipation will make the first bite even more rewarding! Now you’re ready to cheer your favorite team while dipping into this delightful Cheesy Super Bowl Party Spinach Artichoke Dip, leaving everyone at your gathering clamoring for your secret recipe. Enjoy the glory of being the unofficial snack champion of the day! Perfecting Cheesy Super Bowl Party Spinach Artichoke Dip Cooking Process Start by sautéing fresh spinach until wilted, then prepare the creamy mixture of cheeses. Combine everything in a baking dish for the optimal bubble and flavor. Timing is key, so always preheat the oven to ensure everything bakes evenly. Add Your Touch to Cheesy Super Bowl Party Spinach Artichoke Dip Feel free to swap fresh spinach with frozen, or add a dash of hot sauce for an extra kick. If you love a little crunch, consider tossing in some breadcrumbs on top before baking for a delightful texture. Storing & Reheating Cheesy Super Bowl Party Spinach Artichoke Dip Store any leftovers in an airtight container in the fridge for up to three days. To reheat, simply pop it back in the oven at 350°F until warm, or microwave in short intervals while stirring to retain creaminess. Some of my fondest memories come from family gatherings where my Cheesy Super Bowl Party Spinach Artichoke Dip stole the show, leaving my relatives in a delightful silence while they devoured every last bite. FAQs About Cheesy Super Bowl Party Spinach Artichoke Dip What is Cheesy Super Bowl Party Spinach Artichoke Dip? Cheesy Super Bowl Party Spinach Artichoke Dip is a delectable blend of creamy cheeses, fresh spinach, and tangy artichoke hearts, perfect for any gathering, especially your Super Bowl parties. This warm and bubbly dish offers a delightful experience, with its rich flavors and gooey texture that pair wonderfully with crunchy tortilla chips or toasted baguette slices. It’s a crowd-pleaser that’s easy to prepare, making it an ideal snack for entertaining friends and family while cheering for your favorite team. How long does it take to prepare Cheesy Super Bowl Party Spinach Artichoke Dip? The preparation
Delicious Olive and Herb Bread Recipe for Homemade Flavor

Imagine pulling a warm loaf of Olive and Herb Bread from the oven, its enticing aroma dancing through your kitchen like a ballet of deliciousness. Each bite is a flavor explosion with the briny punch of olives mingling seamlessly with fragrant herbs, making it feel like a gourmet experience right in your own home. You’ll find that it’s not just food; it’s an invitation for conversations, laughter, and memories as you share this delightful creation with family and friends. Ah, Olive and Herb Bread, the superhero of the carb world! It’s perfect for cozy dinners, special occasions, or just a lazy Sunday afternoon when you’re simply craving something warm and tasty. Picture this: you’re gathered around the table with loved ones, slathering slices with butter or dipping them in olive oil, and with each bite, you’re reminded why you fell in love with cooking in the first place. Trust me; your taste buds are in for a real treat! Ingredients for Olive and Herb Bread Here’s what you’ll need to make this delicious Olive and Herb Bread: 3 cups all-purpose flour – This forms the foundation of your bread, providing that perfect chewy texture. Opt for unbleached for the best results. 2¼ tsp active dry yeast – Ensure it’s fresh for maximum rise; the yeast is what gives the bread its delightful fluffiness. 1¼ cups warm water – The ideal temperature is about 110°F (43°C). Too hot, and you’ll kill the yeast; too cold, and it won’t activate! 1 cup green or black olives, finely chopped – These briny beauties bring a punch of flavor. Use your favorite variety for personalization! 2 tbsp mixed dried herbs (oregano, basil, thyme) – A fragrant combination that complements the olives beautifully and adds an aromatic touch to your bread. 1 tbsp olive oil – This adds richness and helps achieve a lovely golden crust. Use extra virgin for a burst of flavor. 1 tsp salt – Essential for flavor; it binds the ingredients together and enhances the overall taste of the bread. How to Make Olive and Herb Bread Follow these simple steps to prepare this delicious Olive and Herb Bread: Step 1: Activate the Yeast Start by warming 1¼ cups of water to about 110°F (43°C). If it feels warm to your wrist, you’re golden! Sprinkle 2¼ teaspoons of active dry yeast over the water and let it sit for about 5 minutes until frothy. This step is crucial, as it wakes up your yeast and ensures your bread rises beautifully. Step 2: Mix the Dry Ingredients In a large mixing bowl, whisk together 3 cups of all-purpose flour and 1 teaspoon of salt. Creating a well in the center, pour in the yeast mixture along with 1 tablespoon of olive oil. Stir with a wooden spoon until a shaggy dough begins to form, and you might even find yourself thinking about how you’re basically a kitchen magician right now. Step 3: Knead the Dough Turn the dough out onto a floured surface and knead for about 10 minutes. The dough should become smooth and elastic, and here’s where you can really let out all that frustration from your day. It’s therapeutic, believe me. Step 4: Let It Rise Place your beautifully kneaded dough in an oiled bowl, cover it with a towel, and let it rise until doubled in size. This usually takes about an hour. Use this time to admire your work—yes, you’re doing great! Step 5: Add the Goodies Once your dough has risen, punch it down to release those gassy bubbles, and then mix in 1 cup of finely chopped olives and 2 tablespoons of dried herbs. Gently knead them in until they are evenly distributed. Shape your dough into a loaf or rolls, whatever your heart desires. Step 6: Final Proof and Bake Let your shaped dough rise again on a parchment-lined baking sheet for another 30 minutes. Preheat your oven to 375°F (190°C). Once 30 minutes is up, pop the dough in the oven and bake for 25–30 minutes or until golden brown and it sounds hollow when tapped. Serve warm with a drizzle of olive oil or a pat of butter for a delectable finish. Your Olive and Herb Bread is now ready to steal the show at dinner! This Olive and Herb Bread isn’t just a recipe; it’s a journey through flavors, textures, and memories waiting to happen. So, roll up your sleeves and let’s make some magic happen in your kitchen! Perfecting Olive and Herb Bread Cooking Process To achieve the best results, activate the yeast while mixing dry ingredients. Knead the dough and let it rise before adding olives and herbs. Shape and allow for a second rise before baking to perfection. Add Your Touch to Olive and Herb Bread Feel free to swap out olives for sun-dried tomatoes or add some feta cheese for an extra tang. Experiment with fresh herbs like rosemary or parsley for a unique twist. Storing & Reheating Olive and Herb Bread Store leftover Olive and Herb Bread in an airtight container at room temperature for up to three days. For reheating, wrap it in aluminum foil and warm it in the oven for a few minutes. Cooking this Olive and Herb Bread brings back fond memories of family gatherings where everyone gathered around the table, eagerly waiting for the fresh loaf to cool down just long enough to be devoured. FAQs About Olive and Herb Bread What is Olive and Herb Bread? Olive and Herb Bread is a delicious homemade bread that combines the rich, savory flavors of olives with the aromatic essence of dried herbs like oregano, basil, and thyme. This delightful bread is not only easy to make but also versatile, serving as a great accompaniment to soups, salads, or a standalone snack slathered with butter. The beautiful golden crust and soft, flavorful interior will impress your family and friends, making it a perfect centerpiece for any meal. How do I store Olive
Delicious Crispy Potato Wedges Recipe for Perfect Snacks
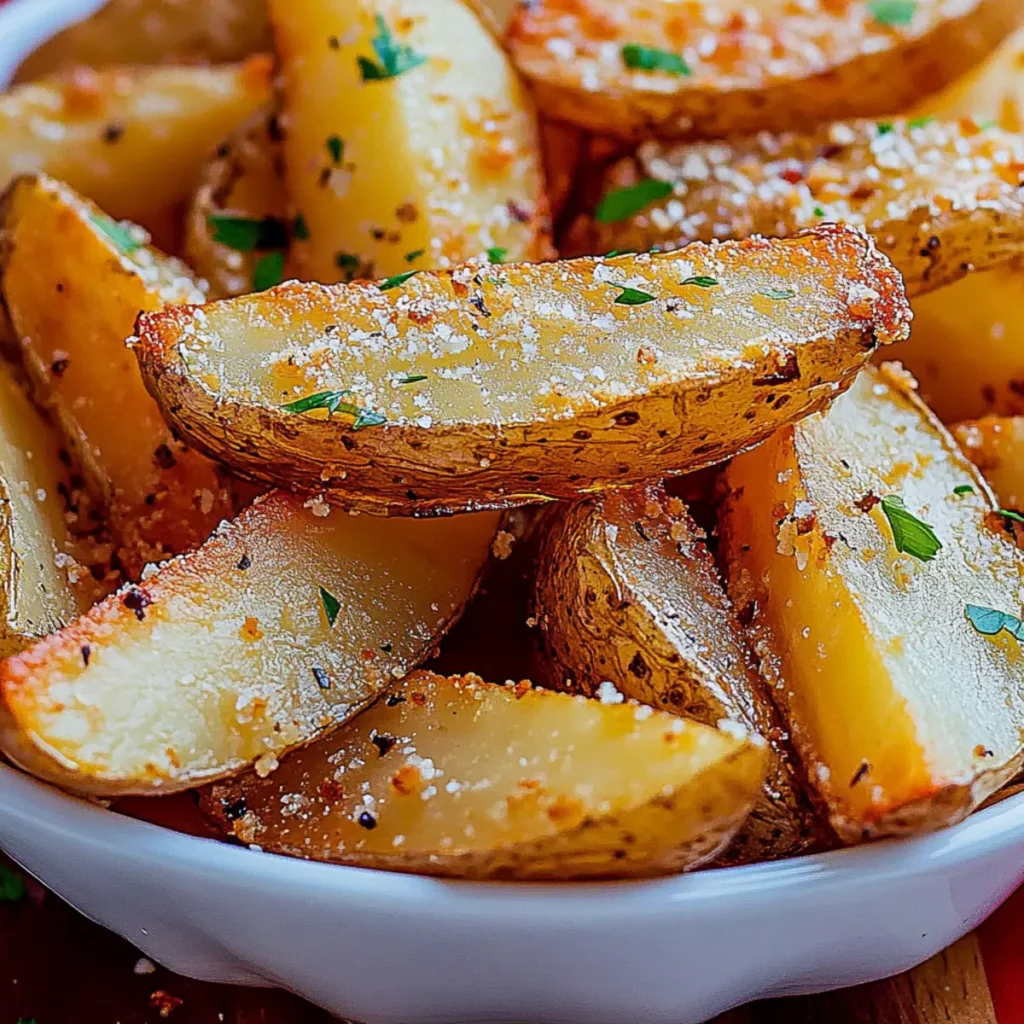
Aren’t crispy potato wedges just the epitome of comfort food? Picture this: you take that first bite, and you’re greeted with a perfect crunch as the warm, fluffy potato inside makes its presence known. This is not just any potato wedge; this is a crispy potato wedge, seasoned to perfection. Whether you’re hosting a game day gathering, preparing a cozy family dinner, or indulging in a solo snack, crispy potato wedges are your go-to sidekick in culinary adventures. There’s something magical about the aroma of roasted potatoes wafting through your kitchen. Memories of family barbecues, movie nights with loads of dipping sauces, and cozy evenings with friends come flooding back. With minimal effort and a handful of simple ingredients, you’ll have a plate full of crispy potato wedges that’ll make everyone crave for the last bite. Let’s unleash your inner chef and dive into this mouthwatering recipe that promises crispy perfection every time. Ingredients for Crispy Potato Wedges Here’s what you’ll need to make this delicious Crispy Potato Wedges: 4 medium Russet potatoes – These are the stars of the show, known for their starchy texture that turns crispy when roasted. Look for firm ones with no blemishes. 3 tbsp olive oil – Acts as the magic elixir to help the seasoning stick while giving the wedges a delightful crisp. 1 tsp garlic powder – Adds a pungent kick that enhances the overall flavor profile; feel free to adjust depending on your garlic love level. 1 tsp paprika – This spicy little cousin of the bell pepper adds a warm, smoky undertone that elevates your wedges to the next level. Salt and pepper to taste – Classic seasoning duo that brings out the natural sweetness of the potatoes, ensuring each wedge has the perfect balance. How to Make Crispy Potato Wedges Follow these simple steps to prepare this delicious Crispy Potato Wedges: Step 1: Preheat Your Oven Preheat your oven to 425°F (220°C) and prepare a large baking sheet by lining it with parchment paper. This will prevent any sticky situations later on. Step 2: Prepare the Potatoes Wash and scrub the russet potatoes thoroughly; you want them super clean since we’ll keep the skin on for that extra texture. Once that’s done, slice each potato into thick wedges. Think approximately 6-8 wedges per potato, keeping the sizes uniform for even cooking. Step 3: Seasoning Time In a large mixing bowl, toss those glorious potato wedges with the olive oil, garlic powder, paprika, salt, and pepper. Make sure every wedge is beautifully coated; we’re going for flavor overload here, so don’t be shy. Step 4: Arrange for Baking Spread the seasoned wedges in a single layer on the prepared baking sheet. Avoid overcrowding to ensure they all get that beautiful golden brown color; nobody likes a soggy spud! Step 5: Bake to Perfection Slide the baking sheet into the oven and let the magic happen. Bake for 30-35 minutes, flipping the wedges halfway through to achieve that dreamy even crispness. Keep an eye on them in the last few minutes; golden brown is the goal! Step 6: Serve and Enjoy Remove the wedges from the oven once they are irresistibly golden brown and crispy. Let them cool slightly (if you can resist). Serve these crunchy delights with your favorite dipping sauces. Trust me; they disappear fast! Now that you have mastered the art of making crispy potato wedges, you can explore countless possibilities. Pair them with your favorite dipping sauces like garlic aioli, ranch, or even a spicy sriracha mayo to elevate your snack game. These wedges are perfect for family dinners, as movie snacks, or as a side dish at barbecues because, let’s face it, they go with just about everything. So, grab your apron and get ready to whip up these crispy potato wedges that will not only impress your taste buds but also have your friends and family begging for the recipe. Your kitchen is about to become the new hangout spot — and who wouldn’t want that? Enjoy the crunch and savor every moment! Perfecting Crispy Potato Wedges Cooking Process To achieve those perfectly crispy potato wedges, start by washing and cutting the potatoes. After seasoning, ensure they are neatly arranged on the baking sheet for even cooking. Bake them until they are golden and crisp. Add Your Touch to Crispy Potato Wedges Feel free to customize your crispy potato wedges by experimenting with different seasonings. Try adding parmesan cheese, chili powder, or even a sprinkle of herbs like rosemary for a unique twist. Storing & Reheating Crispy Potato Wedges Store leftover crispy potato wedges in an airtight container in the fridge for up to three days. Reheat in an oven for a few minutes to regain their delightful crunch. The first time I made these crispy potato wedges for my friends, their faces lit up with pure joy. We devoured the whole batch in minutes, and the compliments just kept coming. It reminded me how simple ingredients can create moments of happiness. FAQs About Crispy Potato Wedges What is Crispy Potato Wedges? Crispy potato wedges are thick, angular cuts of potato that are seasoned and baked until golden brown and crunchy on the outside while remaining soft on the inside. Often made from Russet potatoes, they are a popular side dish or snack served with various dips, making them a delightful addition to any meal. Whether you’re enjoying a casual dinner or hosting friends, these wedges are sure to impress with their flavor and texture. How Can I Make My Crispy Potato Wedges Extra Crispy? To achieve extra crispy potato wedges, consider soaking cut potatoes in cold water for about 30 minutes before baking. This process removes excess starch, allowing for a better texture. Also, ensure you use a generous amount of oil and space the wedges out on the baking sheet to promote even cooking. Additionally, flipping them halfway through the baking time ensures both sides get that beautiful golden hue and crunch.
Delicious Orange, Pineapple & Coconut Mocktail Recipe for Refreshment

There’s nothing quite as refreshing as the perfect drink on a warm day, and the Orange, Pineapple & Coconut Mocktail might just be your new favorite way to cool down. Imagine sipping on a vibrant, tropical concoction that bursts with the flavors of sweet citrusy oranges and juicy pineapples, all brought together by the creamy richness of coconut. It’s not just a drink; it’s an instant passport to paradise, even if you’re just lounging in your backyard. This drink isn’t just about quenching thirst; it’s about creating moments. Whether you’re hosting a sunny brunch, chilling by the pool, or simply want to treat yourself and your friends to something special, this mocktail fits the bill perfectly. Plus, you won’t even need a special occasion; just blend it up, pour it out, and let the good vibes roll! Ingredients for Orange, Pineapple & Coconut Mocktail Here’s what you’ll need to make this delicious Orange, Pineapple & Coconut Mocktail: 1 cup fresh orange juice – Use freshly squeezed juice for the best flavor; opt for Valencia or navel oranges for a sweet burst. 1 cup pineapple juice – Choose 100% pure pineapple juice for an authentic tropical taste or blend fresh pineapple if you’re feeling adventurous. 1/2 cup full-fat coconut cream – For creaminess and richness; shake well before using if it’s canned, and feel free to substitute with lite version if preferred. 1 cup club soda – This adds the perfect fizz; you can replace it with tonic water for a different twist if desired. Ice cubes – Essential for chilling and enjoying your mocktail to the fullest, add as much as you like! How to Make Orange, Pineapple & Coconut Mocktail Follow these simple steps to prepare this delicious Orange, Pineapple & Coconut Mocktail: Step 1: Squeeze Those Oranges Start by squeezing enough fresh oranges to make 1 cup of juice. You’ll want to roll them under your palm for a few seconds to release the juices and get the most out of them. The aromatics will fill your kitchen, and you’ll be toasty for the tropical vibes already. Step 2: Mix It Up In a large pitcher, combine the freshly squeezed orange juice, pineapple juice, and coconut cream. Whisk until thoroughly blended, allowing each ingredient to meld into a creamy tropical blend that’ll have your taste buds dancing. The colors alone make this mocktail a feast for the eyes! Step 3: Chill Out Pop the pitcher in the refrigerator and let the mixture chill for about 30 minutes. This step is crucial; trust me, sipping a cold drink on a hot day is like a mini-vacation for your taste buds! Step 4: Ice it Up When you’re ready to serve, fill your glasses halfway with ice cubes. You can opt for crushed ice too if that’s your thing; it adds a delightful texture. Step 5: Pour and Fizz Take your chilled mocktail mixture and pour it over the ice-filled glasses, filling them up about two-thirds of the way. Now, top each glass with club soda for that fizzy finish. Stir gently so you won’t flatten those delightful bubbles; we want to keep the party going! Step 6: Garnish and Serve For a little extra flair, garnish with fresh orange slices or pineapple wedges. Not only do they look fabulous, but they’ll also intensify the aromas wafting from your creation. Serve immediately and watch your family and friends swoon with delight! And there you have it—a cocktail that’s not only delicious but also able to transform an ordinary gathering into a memorable moment. With every sip of your Orange, Pineapple & Coconut Mocktail, you might just feel as though you’re perched on a beach sipping from a coconut with an ocean breeze tickling your toes. Cheers to fabulous flavors and memorable moments! Perfecting Orange, Pineapple & Coconut Mocktail Cooking Process Squeeze the fresh oranges first for optimal flavor, then blend the juices with coconut cream. Chill the mixture before serving over ice, and finally add the club soda for that fizzy finish. Add Your Touch to Orange, Pineapple & Coconut Mocktail Feel free to substitute other fruit juices like mango or banana for a unique twist. You can also add fresh mint leaves or a splash of grenadine for added flavor and color. Storing & Reheating Orange, Pineapple & Coconut Mocktail This mocktail is best served fresh, but you can store any leftovers in an airtight container in the refrigerator for up to 24 hours. Give it a good stir before serving to regain that delightful sparkle. After my first attempt at making the Orange, Pineapple & Coconut Mocktail, I remember my friend exclaiming, “This is like a tropical vacation in a glass!” That compliment still warms my heart whenever I whip up this refreshing drink. FAQs About Orange, Pineapple & Coconut Mocktail What is Orange, Pineapple & Coconut Mocktail? The Orange, Pineapple & Coconut Mocktail is a delicious non-alcoholic beverage that combines the refreshing flavors of fresh orange juice, pineapple juice, and creamy coconut cream. Enthusiasts love it for its vibrant colors and tropical taste, making it a perfect drink for warm weather, parties, or simply relaxing at home. This mocktail adds a twist to traditional fruity drinks by being sparkling and foamy, thanks to club soda. It’s not only a treat for your taste buds but also a feast for the eyes. How can I customize the Orange, Pineapple & Coconut Mocktail? There are plenty of ways to add a personal touch to your Orange, Pineapple & Coconut Mocktail. You can substitute different juices like mango or banana for a unique flavor twist. Adding fresh herbs, such as mint or basil, gives it a refreshing edge. If you’re feeling adventurous, try mixing in a splash of grenadine for a gorgeous sunset effect. You can even adjust the sweetness by adding more coconut cream or a touch of honey to cater to your taste. Can I make the Orange, Pineapple & Coconut Mocktail ahead of time? Absolutely! You
Delicious Salmon Balls with Avocado Sauce Recipe for Healthy Eating
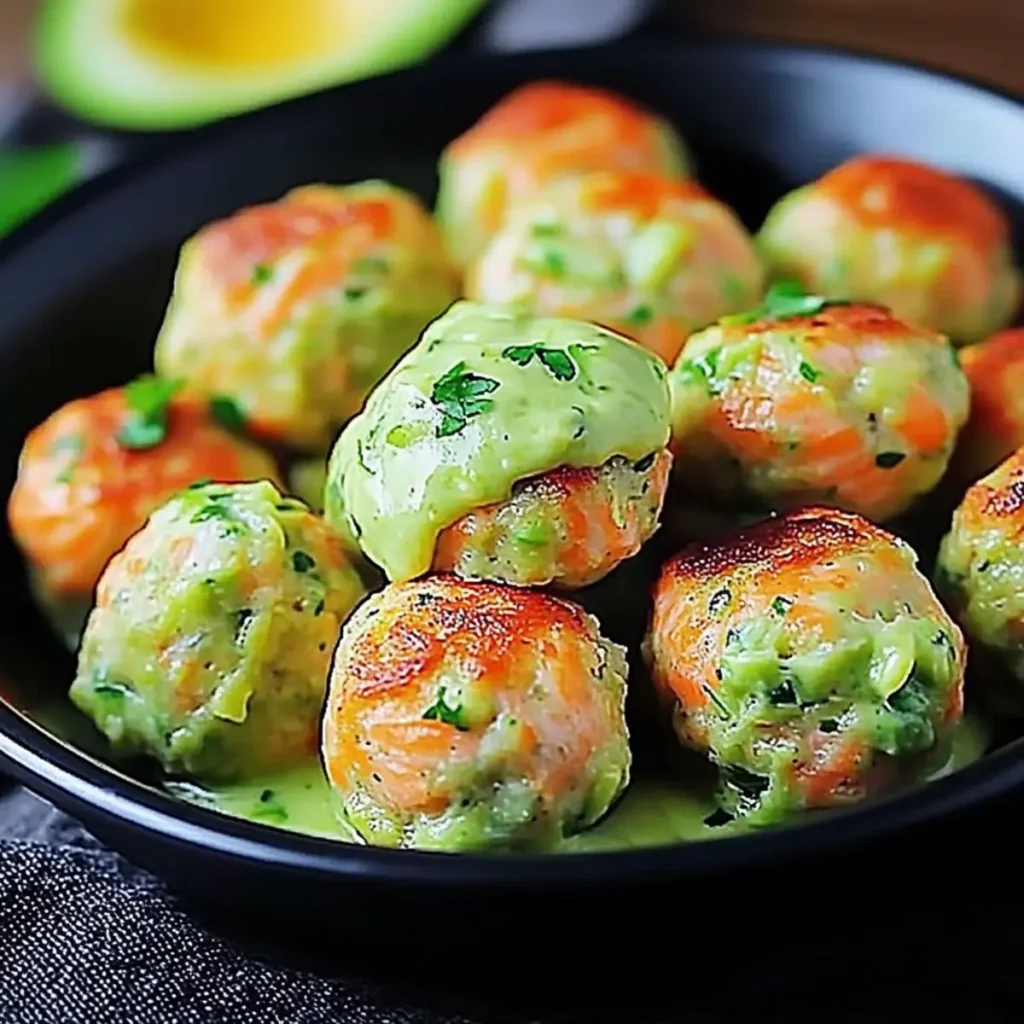
The moment you walk into a kitchen and the delightful aroma of baking salmon wafts through the air, it’s almost impossible not to get giddy. Picture those succulent salmon balls, warm and crispy on the outside, bursting with flavor inside, served alongside a vibrantly green avocado sauce that promises to elevate your taste buds to new heights. If you’re on the hunt for a scrumptious yet healthy dish, look no further than these irresistible Salmon Balls with Avocado Sauce. Imagine hosting a casual dinner party and impressing your friends with this delightful dish that’s not only mouthwateringly delicious but also easy on the eyes and the waistline. Whether it’s a weeknight family meal or a weekend gathering with friends, these salmon balls can easily steal the spotlight. Ingredients for Salmon Balls with Avocado Sauce Here’s what you’ll need to make this delicious Salmon Balls with Avocado Sauce: 1 lb fresh salmon fillet – Select a skin-on fillet for extra flavor and moisture. Fresh, wild-caught salmon is ideal. 1 cup breadcrumbs – Choose plain or seasoned for added flavor. Gluten-free options are available for a dietary twist. 1 large egg – This acts as a binding agent, ensuring your salmon balls hold together beautifully. 2 tbsp fresh dill or parsley, chopped – Fresh herbs brighten the dish! Dill gives a light, refreshing flavor, while parsley adds a pop of color. 2 tbsp fresh lemon juice – The acidity cuts through the richness of the salmon, making every bite balanced and fresh. 1 ripe avocado – Choose a perfectly ripe avocado for a creamy, smooth sauce. ½ cup Greek yogurt – Use plain for creaminess and a tangy punch without the calories of sour cream. 2 cloves garlic, minced – Fresh garlic adds a robust flavor, elevating both the salmon balls and the sauce. 1 tbsp fresh lime juice – This adds a zesty twist to the avocado sauce that perfectly complements the salmon. Salt and pepper to taste – Enhance the flavors with freshly cracked pepper and salt as needed. How to Make Salmon Balls with Avocado Sauce Follow these simple steps to prepare this delicious Salmon Balls with Avocado Sauce: Step 1: Preheat and Prepare Preheat your oven to 400°F (200°C). This step is crucial for that delicious golden-brown crust on the salmon balls. While the oven heats up, line a baking sheet with parchment paper to prevent sticking. Step 2: Chop the Salmon Take your fresh salmon fillet and chop it into small, bite-sized pieces. Place those cheerful little salmon morsels into a large bowl. The more excited you are while chopping, the better your salmon balls will turn out! Step 3: Mix Ingredients Add the breadcrumbs, egg, fresh herbs, lemon juice, and a generous pinch of salt and pepper to the bowl. With your hands (yes, it’s okay to get a bit messy!), mix until everything is thoroughly combined. You want a cohesive mixture that holds together well—think of it as forming a friendly salmon family. Step 4: Form the Balls Use your hands to mold the mixture into balls about the size of golf balls. An ice cream scoop can help if you prefer uniformity. Arrange these beauties on your lined baking sheet, giving them a bit of space to breathe. Step 5: Bake to Perfection Slide the tray into your preheated oven and bake for 15-20 minutes, or until they are golden brown and cooked through. The aroma will be divine, but resist the urge to sneak a bite…we’re almost there! Step 6: Prepare the Avocado Sauce While the salmon balls are baking, grab your food processor. Blend together the ripe avocado, Greek yogurt, minced garlic, lime juice, and a sprinkle of salt and pepper until smooth and creamy. You want this sauce to be velvety—so keep blending if it’s too chunky. To serve, plate your warm salmon balls and drizzle with the luscious avocado sauce. You’ve just created a fantastic dish that’s fresh, flavorful, and undeniably satisfying. Enjoy your creation and watch as your friends rave about your culinary genius! Whether you’re indulging in them at a party, as part of a meal prepping marathon, or simply treating yourself on a quiet evening at home, these salmon balls will surely find a special place in your heart and your tummy. Enjoy every bite! Perfecting Salmon Balls with Avocado Sauce Cooking Process Start by prepping all the ingredients to streamline your cooking process. Chop the salmon into small pieces, mix in the breadcrumbs and spices, then form the balls. While they bake, whip up your creamy avocado sauce for a harmonious finish. Add Your Touch to Salmon Balls with Avocado Sauce Feel free to customize these salmon balls to suit your palate. Swap out the salmon for canned tuna or add finely chopped veggies like bell peppers for extra crunch. Experiment with different herbs like cilantro or basil to elevate the flavors. Storing & Reheating Salmon Balls with Avocado Sauce Store leftover salmon balls in an airtight container in the fridge, where they’ll stay fresh for up to three days. To reheat, pop them in the oven at 350°F (175°C) until warmed through for the best texture and flavor. Sometimes I prepare these salmon balls for friends, and they never fail to impress. The last gathering, my friends insisted I jot down the recipe, noting how they couldn’t believe something so delicious could be so easy to make! FAQs About Salmon Balls with Avocado Sauce What is Salmon Balls with Avocado Sauce? Salmon Balls with Avocado Sauce is a delicious and healthy dish made from fresh salmon fillets, breadcrumbs, and a blend of herbs. These savory balls are baked until golden and crispy, then served with a creamy avocado yogurt sauce that adds richness and flavor. This dish is perfect for a family dinner, meal prep, or even as a fancy appetizer for gatherings. Combining texture and taste, they are both nutritious and delightful, making them a sure hit at any table. How can I
Delicious Cheesy Potato Skins Recipe Perfect for Snacking

There’s something undeniably delightful about the aroma of baked potatoes wafting through the kitchen, don’t you think? Cheesy Potato Skins are not just a dish; they’re an experience that instantly transports you to a cozy gathering with friends or a fun family game night. These golden, crispy delights topped with gooey cheese and savory bacon bits become the perfect addition to any occasion where appetites must be satisfied and spirits lifted. Remember those days when you could survive solely on cheesy snacks during movie marathons? Well, this recipe brings back that nostalgia with an upgraded twist that your taste buds will thank you for. Imagine diving into a crispy potato skin, warm and filled with cheesy goodness, topped with a dollop of sour cream and a sprinkle of green onions—pure bliss! Ingredients for Cheesy Potato Skins Here’s what you’ll need to make this delicious Cheesy Potato Skins: 2 medium russet potatoes – Choose firm potatoes for a great texture that holds well when baked. 1 cup shredded sharp cheddar cheese – Using sharp cheddar enhances the flavor, making those cheesy bites extra delectable. ½ cup cooked and crumbled bacon bits – Bacon adds a burst of smoky flavor; use pre-cooked for convenience or fry your own for the freshest taste. ¼ cup sour cream – This creamy addition provides a refreshing contrast to the rich flavors of cheese and bacon. 2 tablespoons chopped green onions – For a fresh crunch and a pop of color that brightens up each bite. 2 tablespoons olive oil – Helps in crisping the potato skins while adding a rich flavor. Salt and pepper to taste – Essential for seasoning, because what’s life without a little flavor adventure? How to Make Cheesy Potato Skins Follow these simple steps to prepare this delicious Cheesy Potato Skins: Step 1: Preheat Your Oven Preheat your oven to 400°F (200°C). While it’s warming up, give your russet potatoes a good wash under cold water. You want them clean for the best bake. Step 2: Bake the Potatoes Poke a few holes in each potato with a fork to allow steam to escape during baking. Place them directly on a baking sheet like they’re about to get their beauty sleep, and bake them for 45-60 minutes until they’re tender and a fork can easily glide through. Step 3: Cool and Scoop Once baked, let the potatoes cool for about 10 minutes. Slice each potato in half lengthwise and carefully scoop out most of the flesh, leaving about a quarter-inch thick shell—this is where all the magic will happen. Step 4: Season and Crisp Brush the insides of the potato skins with olive oil and don’t skimp on the salt and pepper; they deserve to be seasoned just right. Return them to the oven for about 10 minutes, letting them crisp up—this is the moment when the kitchen starts smelling incredible. Step 5: Fill with Cheese and Bacon Once your potato skins are nice and crispy, it’s time for the good stuff. Fill each skin generously with shredded cheddar and crumbled bacon. Return them to the oven for another 5 minutes, or until the cheese is bubbly and beautifully melted. Step 6: Add the Finishing Touches When you remove them from the oven, they should look gloriously cheesy and inviting. Top each potato skin with a dollop of sour cream and a sprinkle of chopped green onions for that vibrant touch. Serve these Cheesy Potato Skins freshly baked, and watch them disappear! They’re irresistible, simply perfect for sharing, and guarantee to bring smiles to everyone at your table. Dive in and enjoy every cheesy, crispy bite, and relish the satisfied smiles that follow! Perfecting Cheesy Potato Skins Cooking Process Begin by baking your potatoes until they’re tender. While they cool, prepare your toppings. Crispy skins come next, followed by loading them up with cheese and bacon before the final bake to melt everything to gooey perfection. Add Your Touch to Cheesy Potato Skins Feel free to swap russet potatoes for sweet potatoes for a unique twist. You can also add jalapeños for heat, change the cheese to pepper jack, or load on extras like guacamole or even chili for added flavor. Storing & Reheating Cheesy Potato Skins Store any leftovers in an airtight container in the fridge for up to three days. To reheat, place them on a baking sheet at 350°F (175°C) until heated through, keeping the skins nice and crispy. Sometimes I whip up Cheesy Potato Skins for game night, and I still remember my friend’s face when he took the first bite. Food can connect us all, and these little beauties surely steal the show! FAQs About Cheesy Potato Skins What are Cheesy Potato Skins? Cheesy Potato Skins are a delicious appetizer made from baked potatoes that are halved and hollowed out, then filled with a mixture of shredded cheese, crispy bacon, and various toppings. These delightful bites offer a crunchy exterior and a flavorful filling, making them the perfect snack for game nights, gatherings, or even as a side dish. With just a few ingredients, Cheesy Potato Skins combine comfort food and versatility, allowing you to customize them to suit your taste. How do I make Cheesy Potato Skins crispy? To achieve that perfect crispy texture for your Cheesy Potato Skins, it’s crucial to bake the potato halves after hollowing them out. Brushing the insides with olive oil and seasoning them before returning to the oven ensures they crisp up nicely. Additionally, allowing them to cool slightly after baking helps them hold their shape and texture. A final bake filled with cheese and toppings guarantees an irresistible crunch when you take a bite. Can I use different toppings for Cheesy Potato Skins? Absolutely! One of the best things about Cheesy Potato Skins is their versatility. You can swap out the cheddar cheese for pepper jack for a spicy twist or top them with ingredients like jalapeños, guacamole, or even chili for a unique flare. Various herbs,
Delicious Cheeseburger Egg Rolls Recipe for Easy Appetizers

There’s something undeniably magical about transforming classic comfort food into a fun, bite-sized treat. Imagine sinking your teeth into golden, crispy egg rolls that ooze with the savory goodness of a cheeseburger. These delightful Cheeseburger Egg Rolls are the ultimate game-changer for snacking, perfect for parties or just satisfying that craving for something deliciously familiar. These rolls bring back fond memories of backyard barbecues and late-night cravings, but in a fun and portable form. Whether you’re hosting a game day gathering or simply need a quick snack, these cheeseburger egg rolls promise to deliver an explosion of flavor with every crispy bite. Let me tell you, you won’t want to share! Ingredients for Cheeseburger Egg Rolls Here’s what you’ll need to make this delicious Cheeseburger Egg Rolls: 1 lb ground beef – Choose a lean ground beef for less grease and more flavor. You can also substitute with turkey or plant-based meat for a healthier twist. 1 cup shredded sharp cheddar cheese – This cheese adds a rich flavor; feel free to swap it with your favorite melty cheese like mozzarella for a different profile. 10 egg roll wrappers – Find these in the refrigerated section of your grocery store. Look for thicker wrappers for added sturdiness during frying. 1 medium yellow onion – Diced finely, this adds depth and sweetness. For a milder flavor, you can use green onions instead. 2 tbsp ketchup – A classic condiment for that familiar cheeseburger taste. Feel free to experiment with BBQ sauce or sriracha for a twist. 2 tbsp mustard – Yellow mustard is traditional, but Dijon can elevate the flavor for those who love a bit of tang. 1 tsp garlic powder – Garlic powder brings a depth of flavor that complements the beef well. Fresh minced garlic works too, but adjust to your taste. Salt and pepper to taste – Essential for seasoning; fresh ground black pepper gives a more robust flavor. Oil for frying or cooking spray for baking – Use canola or vegetable oil for frying. If baking, opt for cooking spray for a lighter version. How to Make Cheeseburger Egg Rolls Follow these simple steps to prepare this delicious Cheeseburger Egg Rolls: Step 1: Brown the Beef Start by heating a skillet over medium heat. Add the ground beef and diced yellow onion, cooking for about 5-7 minutes until the beef is browned and the onions have softened. Drain any excess fat to avoid greasiness. Step 2: Season the Mixture Once the beef and onions are cooked and cooled slightly, sprinkle in the garlic powder, salt, and pepper. Then, stir in the ketchup and mustard until everything is well combined and heated through, enhancing that cheeseburger flavor. Step 3: Prepare the Egg Roll Wrappers Lay an egg roll wrapper in front of you in a diamond shape. Spoon about two tablespoons of the beef mixture near the bottom corner of the wrapper. Fold that corner over the filling tightly while tucking in the sides as you go. Use a little water to seal the edges. Step 4: Heat the Oil or Oven If you’re frying, heat enough oil in a deep pan to cover the egg rolls. For baking, preheat your oven to 400°F (200°C) and lightly spray a baking dish with nonstick spray to prevent sticking. Step 5: Fry or Bake the Egg Rolls Carefully place the egg rolls into the hot oil, frying until they are golden brown, which should take about 3-5 minutes. For baking, arrange them on the prepared baking dish and bake for about 15-20 minutes or until crispy and golden. Step 6: Serve and Enjoy Once cooked, transfer your cheeseburger egg rolls to a plate lined with paper towels to absorb any excess oil. Serve them hot with extra ketchup and mustard on the side for dipping, and watch them disappear! These cheeseburger egg rolls not only deliver on taste but also create lasting memories with every crispy, cheesy bite. Whether you’re enjoying them at a party or as a quick weeknight snack, they’re bound to be a delightful treat. You Must Know About Cheeseburger Egg Rolls This showstopping Cheeseburger Egg Rolls delivers restaurant-quality results using simple ingredients you probably already have at home. The perfect balance of textures and flavors creates an unforgettable dining experience that will have everyone asking for seconds. Picture-perfect presentation with vibrant colors makes this dish absolutely Instagram-worthy and guaranteed to impress any dinner guest. Incredibly versatile recipe that works beautifully for weeknight dinners, meal prep, special occasions, or even outdoor entertaining sessions. Perfecting Cheeseburger Egg Rolls Cooking Process Start by browning the ground beef with onions to build flavor. While it cools, prepare your egg roll wrappers for easy stuffing and rolling. Fry or bake just before serving for the ultimate crispy bite. Add Your Touch to Cheeseburger Egg Rolls Get creative by swapping out the beef for ground turkey or plant-based protein. Spice things up with jalapeños for heat or add pickles to enhance that classic cheeseburger flavor. Storing & Reheating Cheeseburger Egg Rolls Store leftover Cheeseburger Egg Rolls in an airtight container in the fridge for up to three days. Reheat in an oven at 350°F for about 10 minutes for a crispy finish. I remember the first time I made Cheeseburger Egg Rolls for a game night. My friends couldn’t get enough and insisted I make them every week. The recipe quickly became a staple, bringing everyone together with smiles and happy bellies. FAQs About Cheeseburger Egg Rolls What are Cheeseburger Egg Rolls? Cheeseburger Egg Rolls are a delicious twist on traditional egg rolls, combining the classic flavors of a cheeseburger with a crispy, golden shell. This dish features ground beef, cheddar cheese, onions, and seasonings wrapped in egg roll wrappers and either fried or baked to crispy perfection. They are often served with dipping sauces like ketchup or mustard, making them a popular choice for appetizers or party snacks. Perfect for gatherings, they offer a fun, handheld option that is